Omnipod Insulin Pump: Features and Pros (2026)
Omnipod insulin pump review covers Omnipod 5 features, setup, real pros and cons, Dexcom G7 integration, and how it compares to tubed pumps.

In this article(9)
The Omnipod insulin pump is the only fully tubeless pump on the US market, and for many people with diabetes that single feature is enough to make it worth a closer look. We spent time with the Omnipod 5 system and put together this honest breakdown of its features, the setup process, and the trade-offs you should know about before committing.
If you are weighing whether to switch from injections, change pumps, or start your first one, the choice of pump shapes a lot of daily life: how you sleep, how you exercise, how you dress, even how you swim. There is no universally best pump. There is the pump that fits your body, your routine, and your insurance, and figuring that out takes more than a manufacturer's brochure.
This review covers the Omnipod 5 specifically (the latest generation widely available in the US), including its automated insulin delivery features, Dexcom integration, setup walkthrough, real-world pros and cons, and how it compares to its main competitors. We will be honest about what it does well and where it falls short.
Omnipod Insulin Pump Overview
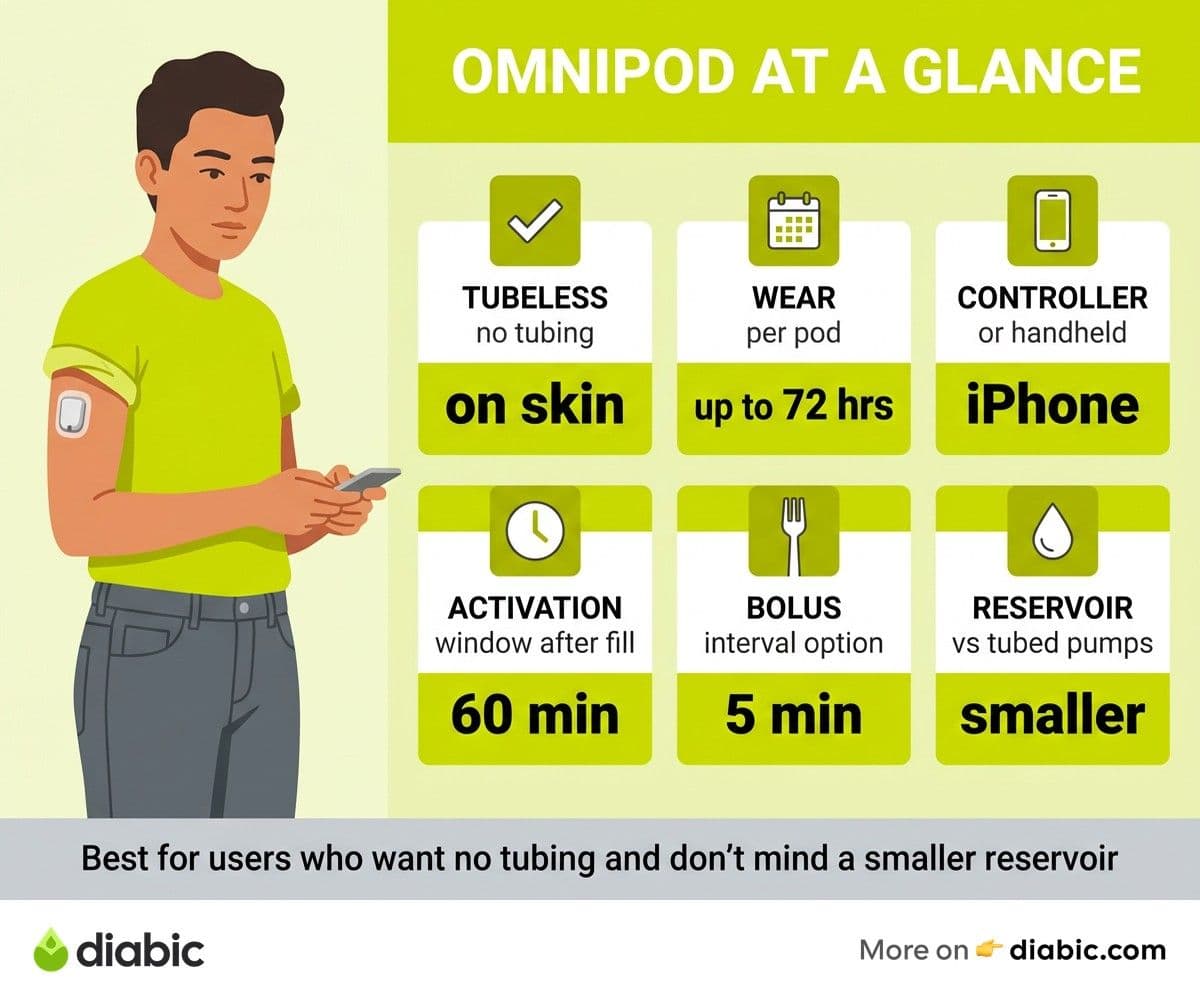
The Omnipod insulin pump is made by Insulet Corporation and is the only commercially available tubeless pump in the United States. Unlike traditional pumps that connect to your body through a length of plastic tubing and an infusion set, the Omnipod is a small self-contained pod about the size of a large bottle cap. The pod sticks to your skin with adhesive, contains its own insulin reservoir and battery, and delivers insulin through a small soft cannula that inserts automatically when you activate the pod.
You wear a pod for up to 72 hours (3 days), then remove it and replace it with a new one. The pod is controlled either by a dedicated handheld controller (the PDM, or Personal Diabetes Manager) or, for the Omnipod 5 system, by a compatible smartphone app on supported iPhone and Android devices. According to Insulet's product information at omnipod.com, Omnipod 5 received FDA clearance for automated insulin delivery in adults and children ages 2 and up.
The Omnipod 5 includes SmartAdjust technology, which uses CGM data from a Dexcom G6 or G7 sensor to automatically adjust basal insulin every 5 minutes. The algorithm itself was cleared by the FDA as an interoperable automated glycemic controller (510(k) K203774), which is the regulatory pathway behind closed-loop pump components. This is the closed-loop or automated insulin delivery (AID) feature that has changed how many people manage type 1 diabetes. The system aims to keep glucose within a target range you set, reducing the manual adjustments you would otherwise make for exercise, stress, hormones, and the dozens of other variables that affect blood sugar.
Who is it designed for? The Omnipod 5 is approved for type 1 diabetes in adults and children ages 2 and older, and for type 2 diabetes in adults. It is most often used by people with type 1, but its tubeless design makes it appealing for active users, kids, and anyone who has tried tubed pumps and disliked the experience. Our practical insulin pump guide for type 1 diabetes covers the broader landscape of pumps for context.
Omnipod 5 Specs and Key Features
The headline numbers on the Omnipod 5 reveal both its strengths and its constraints. Each pod holds up to 200 units of U-100 insulin (Humalog, Novolog, or Admelog are the approved insulins) and is rated for up to 72 hours of wear. The pod itself is waterproof to IP28 (8 feet for up to 60 minutes), meaning showers, swimming, and beach days are not an issue.
Pod dimensions are about 1.53 inches long, 1.3 inches wide, and 0.57 inches thick. It weighs roughly 26 grams when filled. That is small enough to be discreet under most clothing, but it is also bulkier than a slim tubed pump tucked into a pocket. The bulk is a real consideration for some users and a non-issue for others; we will return to this in the pros and cons section.
The SmartAdjust algorithm is the heart of the Omnipod 5 experience. It uses Dexcom G6 or G7 sensor data to predict glucose 60 minutes ahead and adjusts basal delivery accordingly, increasing or decreasing the rate or even pausing entirely if a low is predicted. You can set a glucose target between 110 and 150 mg/dL, with the option to use Activity mode (target 150 mg/dL) for exercise. Bolus doses for meals are still manual; the system does not yet auto-bolus for food, which is a gap compared with some competing AID systems. The Dexcom G7 integration page confirms compatibility with Omnipod 5.
Pod management options include the PDM controller, which is a touchscreen device that ships with your starter kit, or the Omnipod 5 smartphone app. The smartphone app currently supports specific iPhone models and Android devices. If your phone is on the supported list, the app is genuinely the more convenient option, since you carry one less device. If your phone is not supported, the PDM is fine but adds a piece of hardware to your day.
How to Set Up the Omnipod Insulin Pump
Setting up the Omnipod for the first time is more straightforward than most tubed pumps because there is no infusion set, tubing, or priming process visible to you. The pod handles the cannula insertion automatically when you activate it. Still, the first setup can feel like a lot, so here is what to expect.
What comes in the starter kit: a PDM controller (or, if you are using the smartphone app, just the welcome materials), a starter supply of pods, alcohol prep wipes, batteries for the PDM, and the user guide. Insulin and CGM sensors are ordered separately through your pharmacy and Dexcom respectively.
To fill and activate a pod, you start by filling a syringe with the prescribed amount of insulin from your vial. The pod has a fill port where you inject the insulin. Once filled, the pod is paired with the controller or app, which then guides you through priming and placement. The auto-insertion of the cannula happens with a small click that you can feel; most users report it is much less intimidating than manual infusion sets.
Choosing a placement site matters. The approved wear sites for Omnipod 5 include the abdomen, the back of the upper arm, the lower back, the upper buttocks, and the upper thighs. Most users rotate between two or three of these. Avoid waistbands, areas of scar tissue or stretch marks, and recently-used sites to give skin time to recover. How to use an insulin pump effectively involves a rotation plan that you can map on your phone or in a notebook.
After activation, the Omnipod 5 enters a 2-hour learning mode if you are starting fresh or switching from a different system. During this window, the algorithm is gathering data about your glucose patterns and insulin needs, so it operates in a more conservative mode. By day 3 or 4, the algorithm has tuned itself to your patterns, and most users notice better in-range time than they had during the first day.
Omnipod Pros and Cons
Here is where we get specific. Pros first.
Tubeless design. No insulin pump tubing means no catching tubing on door handles, no disconnecting for showers, no awkward sleeping positions because the tubing is in the way. For people with active lifestyles or anyone who has felt limited by a tubed pump, this alone changes the experience.
Waterproof. The pod itself goes everywhere you go, including the shower, the pool, and the ocean. You do not disconnect for water activities. This is one of the most consistent reasons users cite for choosing Omnipod.
Discreet under clothing. The pod is visible if you are looking for it, but it tucks under most shirts, dresses, and athletic wear without showing. There is no clip on a belt, no device in a pocket, no visible hardware.
Strong Dexcom G7 integration. The Omnipod 5 system pairs cleanly with the Dexcom G7, and the SmartAdjust algorithm uses CGM data effectively to manage basal rates. Users typically see better time in range than on multiple daily injections, often comparable to other AID systems.
Smartphone app option. Carrying one less device is a real quality-of-life upgrade, especially for people who already keep their phone with them constantly.
Now the cons.
Pod bulk. Compared to a slim tubed pump worn in a pocket, the pod sits on your body. People with smaller frames or kids especially feel this. It can also occasionally catch on clothing or seatbelts in ways tubed pumps do not.
Limited insulin capacity. 200 units per pod is enough for most users, but people with higher insulin requirements (often adults with type 2 or larger body sizes) may need to change pods more frequently than the 3-day wear time suggests, which adds cost.
Adhesive issues. Some skin types react to the pod adhesive, leading to redness, itching, or pods that lift early. Workarounds include barrier wipes, adhesive patches placed underneath, or different placement sites, but for a small percentage of users the irritation is significant.
No manual auto-bolus. SmartAdjust handles basal insulin automatically but does not auto-correct for meals. You still bolus manually for carbs, which is not a flaw exactly but is worth knowing if you have heard about systems that auto-bolus.
Pod waste. Every 3 days, you discard a pod. Over a year, that is more than 120 pods, plastic and electronics. For users who care about waste, this is a real consideration; tubed pumps reuse the pump itself for years.
Cost without strong insurance. Out of pocket, Omnipod 5 pods can be expensive. Coverage varies widely; check our breakdown of insulin pump cost with insurance before committing.
How does Omnipod compare to its main competitors? The Tandem t:slim X2 and the Medtronic MiniMed 670G vs 780G are the main alternatives in the AID space.
Endpoints from the Omnipod 5 pivotal trial published in clinical journals showed meaningful improvements in time in range and reduced time in hyperglycemia compared to participants' baseline therapy, especially overnight. Real-world results vary, but most users see consistent improvement compared with multiple daily injections.
Who Should Choose the Omnipod
The Omnipod tends to be the right choice for active people, people who travel often, and anyone who has tried tubed pumps and felt restricted. If you swim regularly, run, do contact sports, or simply hate the feeling of tubing, the pod design solves a problem the others do not. Users who switch from tubed pumps to Omnipod often describe the change as feeling lighter, both physically and psychologically.
Children and teens are a strong fit for Omnipod for similar reasons. The smaller body size handles tubed pumps less gracefully (more chances to catch tubing on furniture, more visibility under school clothes), and the pod tucks neatly onto the back of the arm or the lower back. Pediatric endocrinologists frequently recommend Omnipod for these reasons, and the ADA Standards of Care 2026 list AID pump therapy as the standard of care for most pediatric type 1 patients.
Where the Omnipod may not be the best fit: people with very high daily insulin needs (where 200 units per pod becomes a constraint), people with skin conditions that make adhesive a chronic problem, and people who strongly prefer the auto-correction bolus features available on the Tandem t:slim X2 or Medtronic 780G. Cost and insurance coverage also drive decisions in either direction; some plans favor one system over another in ways that override personal preference.
From my experience: Over 14 years with type 1 diabetes, I have used both tubed pumps and the Omnipod across different life phases. The honest summary: the Omnipod made my swimming, sleeping, and travel noticeably easier, and the closed-loop performance on Omnipod 5 is solid. The pod bulk took two weeks to stop noticing. The hardest adjustment was rotating sites I had not used before, especially the back of the arm. If you are wavering between tubed and tubeless, the question is mostly how you live, not which is technically superior.
If you are still working through the broader decision, our roundup of the best diabetes wearable devices for 2026 puts the Omnipod in context alongside CGMs, smart pens, and other connected diabetes tech.
Frequently Asked Questions
What insulin pump works with FreeStyle Libre 3?
The Omnipod 5 currently integrates with the Dexcom G6 and Dexcom G7, not the FreeStyle Libre 3. As of the most recent updates, no fully approved automated insulin delivery pump in the US uses the Libre 3 directly. Some users connect their Libre data through third-party apps for monitoring, but that does not enable closed-loop pump control. Insulet has signaled interest in expanding sensor compatibility in future Omnipod 5 updates, and Abbott has been working on closed-loop integrations of its own. Talk to your endocrinologist about which pump and CGM combination has the strongest current integration for your needs.
How do you insert the Omnipod pod?
You do not manually insert the cannula. After filling the pod with insulin, peeling off the adhesive backing, and placing it on a clean wear site, you activate the pod through the controller or app. The pod then automatically inserts the soft cannula with a small spring-loaded mechanism. You feel a click and a brief pinprick sensation, then nothing. The whole process takes under a minute once you are comfortable with the steps. Insulet's setup videos at omnipod.com walk through the process visually.
Is the Omnipod waterproof?
Yes, the Omnipod pod is rated IP28, which means it can be submerged up to 8 feet for up to 60 minutes. You can shower, swim, take a bath, or wear it in the rain without disconnecting. The PDM controller is not waterproof and should be kept dry, but the pod on your body is fine. This is one of the practical advantages over tubed pumps, which usually require disconnection for water activities.
Whether the Omnipod insulin pump is the right choice depends on how you live, what your insurance covers, and what your endocrinology team recommends. Talk to your doctor about a trial period or a clinic demo before you commit to a multi-year supply order.
Dr. Shanto Arian is an internal medicine physician now specializing in clinical and aesthetic dermatology, with a parallel academic focus on epidemiology and public health. He holds an MBBS, MPH, MSc (UK), MRCP (UK), MRCPI (Ireland), Diploma in Dermatology (UK), and Diploma in Aesthetic Medicine (USA). Dr. Arian trained in internal medicine, including hospital work on hematology cases such as graft-versus-host disease, before moving toward dermatology. Skin is one of the earliest places diabetes shows itself, from acanthosis nigricans and diabetic dermopathy to slow foot wound healing, and that intersection is where his clinical and Diabic-review work meet. On Diabic, Dr. Arian medically reviews content on diabetes diagnosis, complications, dermatologic manifestations, and pharmacotherapy, ensuring every claim aligns with current ADA, NICE, and peer-reviewed literature.
Medically reviewed by
Dr. Rezwana Parvin Rumpa is an obstetrics and gynaecology specialist with clinical focus on gestational diabetes, PCOS, and fertility. She holds the MRCOG (Final Part) from the Royal College of Obstetricians and Gynaecologists in London, the MRCPI (Final Part) from the Royal College of Physicians of Ireland, and an MBBS from Shaheed Monsur Ali Medical College under Dhaka University. Dr. Rumpa serves as a Senior Medical Officer in the Obs and Gynae department at BRB Hospitals Ltd, where she has spent three years managing prenatal care, emergency obstetric cases, and women's-health surgery. On Diabic, she medically reviews content for women living with diabetes, with particular attention to pregnancy, PCOS, and reproductive-health intersections.
More from Devices & Technology
View all
Fasting vs Postprandial Glucose: What's the Difference
Fasting vs postprandial glucose readings tell different stories about your blood sugar. Learn what each number means and how to act on it.

Best Glucometer for Elderly and Low-Vision Users
Best glucometer for elderly and low-vision users: large displays, audio readouts, no-coding strips, and budget picks that make daily testing easier.

Online Diabetes Coaching: How to Choose a Good One
Online diabetes coaching can fill the gaps between doctor visits. Learn what credentials to check, red flags to avoid, and how to pick a quality program.
Clinician-reviewed habits, plain-language guides, and honest answers - the small shifts that make living with diabetes feel lighter, every day.